Approx. Time: 1.5 hrs
*Tools and Hardware Needed: (Westach Gauge, Part Number 2DC2-1S)
1 - 7/16" Drill Bit
1 - 3/16" Drill Bit
1 - 2 1/8" Hole Saw
1 - Electric or Cordless Drill
1 - Measuring Tape or Ruler
1 - Hammer
1 - Center Punch
1 - Pencil or Marking Pen Of Choice
1 - Tube Hi-Temp Silicon
Step 1:
Decide where you want to mount the guage. We decided to move the Ethanol switch further to the left, and mount the gauge in the cowling. Mounted here, it is out of the way, and doesn't look out of place.
Step 2:
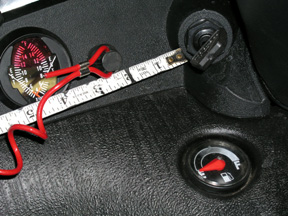
Measure 6 1/8" from key mount (See Pic 1) and mark. Use 7/16" drill bit to drill hole for Ethanol switch. Put switch through hole, and tighten burr with pliers.
Step 3:
Remove switch and relocate to new hole. If you are careful, you can use a razor blade to remove the "Ethanol - Regular" decal. Once removed, you can apply around new hole.
Step 4:
Measure 4 1/4" from key mount (See Pic 1)and mark. Use 2 1/8" hole saw to drill hole for gauge.
Step 5:
Put guage in hole, put installation hardware on back, and tighten thumb-srcews to hold gauge in place.
Step 6:
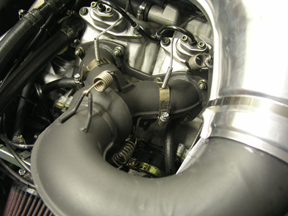
Measure 2 3/4" from inside edge of exhaust flange (between flange and cylinder) onto top of exhaust manifold. Mark this spot.
Step 7:
Use center punch and hammer to make a divit for the drill bit on the mark you made in Step 6.
Step 8:
Use 3/16" drill bit to drill hole for EGT probes.
Step 9:
Place a small amount of silicon around hole (this helps to seal the hole so that no exhaust will leak out of hole), and place probe in hole. Tighten hose clamp.
Step 10:
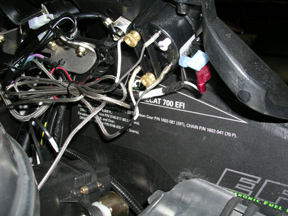
Run probe wires to guage.
Cylinder 1 (Clutch Side) probe wires attach as follows:
White Lead to Pin #1
Black Lead to Pin #8
Cylinder 2 (Mag Side):
White Lead to Pin #4
Black Lead to Pin #5
Step 11:
Determine which light you want to use, and place in back of guage. Wire light leads as follows:
One lead to Wire
Second lead to Wire
Step 12:
Close hood and enjoy an afternoon of riding!
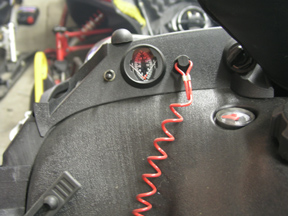
*HINT* Since it is easier to see a color rather than a number while riding, I colored my EGT lens with a RED permanant marker from the warning temp (1200) to the top of the scale (1500). If your sled starts running hot, the white needle goes into the red area, and you can see the red better than trying to see a number. The color will last about 1 season, so I usually re-color it each season. You can see how I have colored my gauge in the pics below.